
You read three articles about SEO. Each one mentioned twelve things you should be doing. Now you have forty tabs open, a vague sense that your site is broken, and no idea what to actually do first.
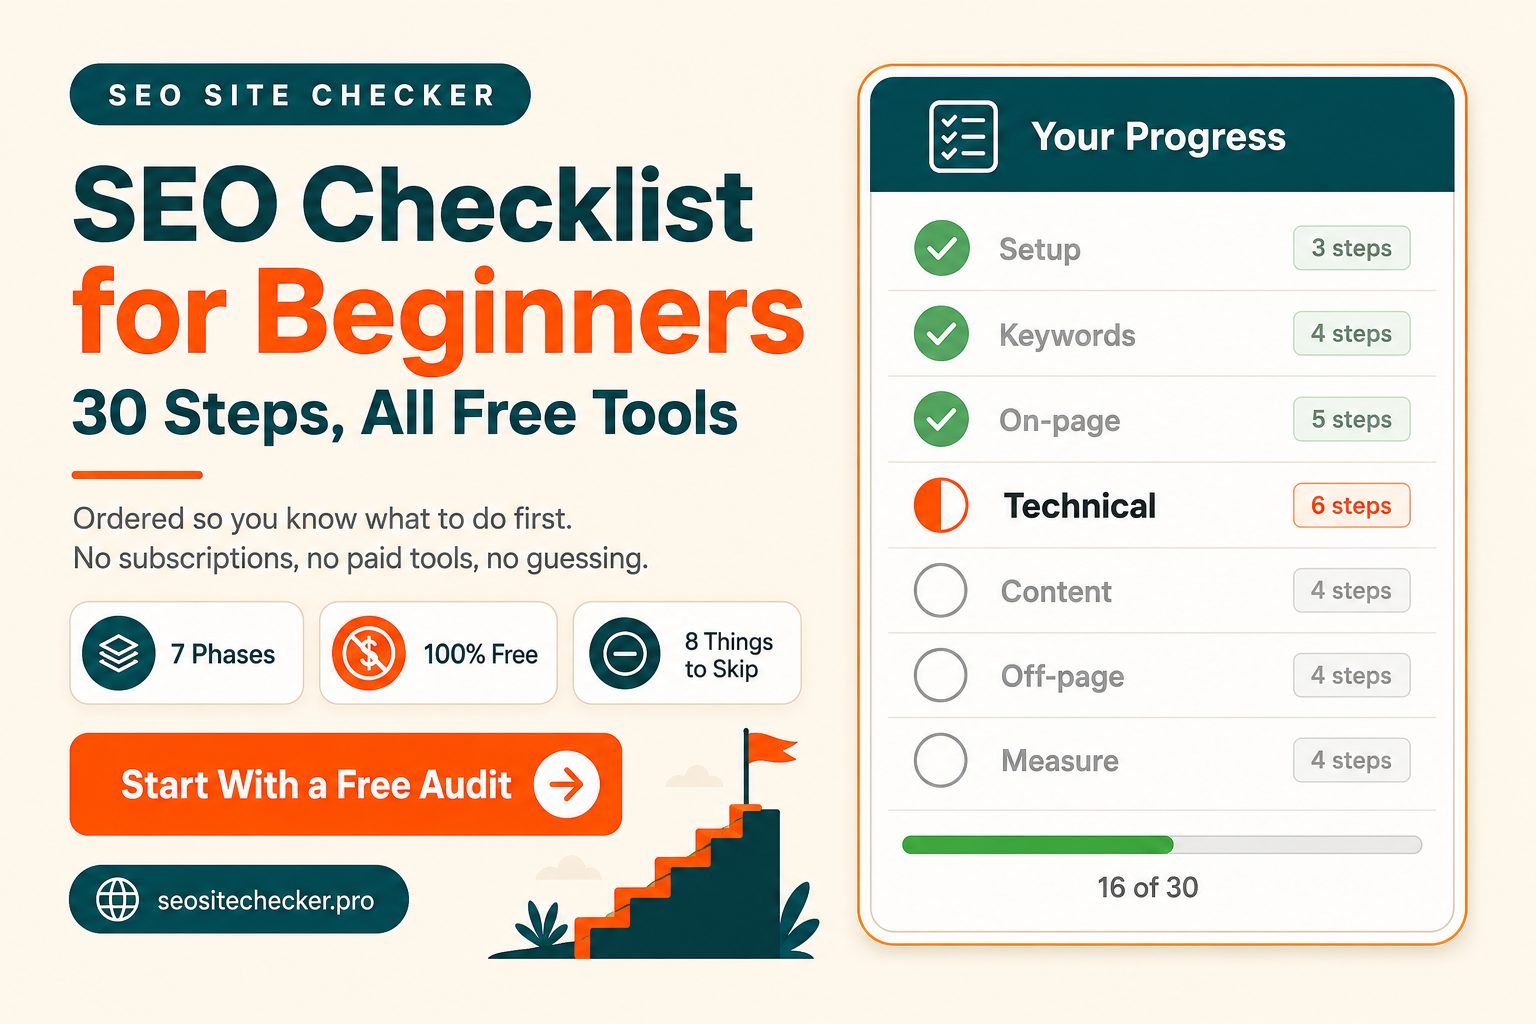
This checklist fixes the ordering problem. Thirty steps, grouped into seven phases, arranged so each one builds on the last. Every step tells you what to do rather than what to understand. And there is a section near the end telling you what to ignore, which for a beginner is often more useful than another thing to add to the list.
Two honest notes before you start. This is a few weekends of work, not an afternoon. And results take months rather than weeks. Knowing that now is better than discovering it in week three and concluding that SEO does not work.
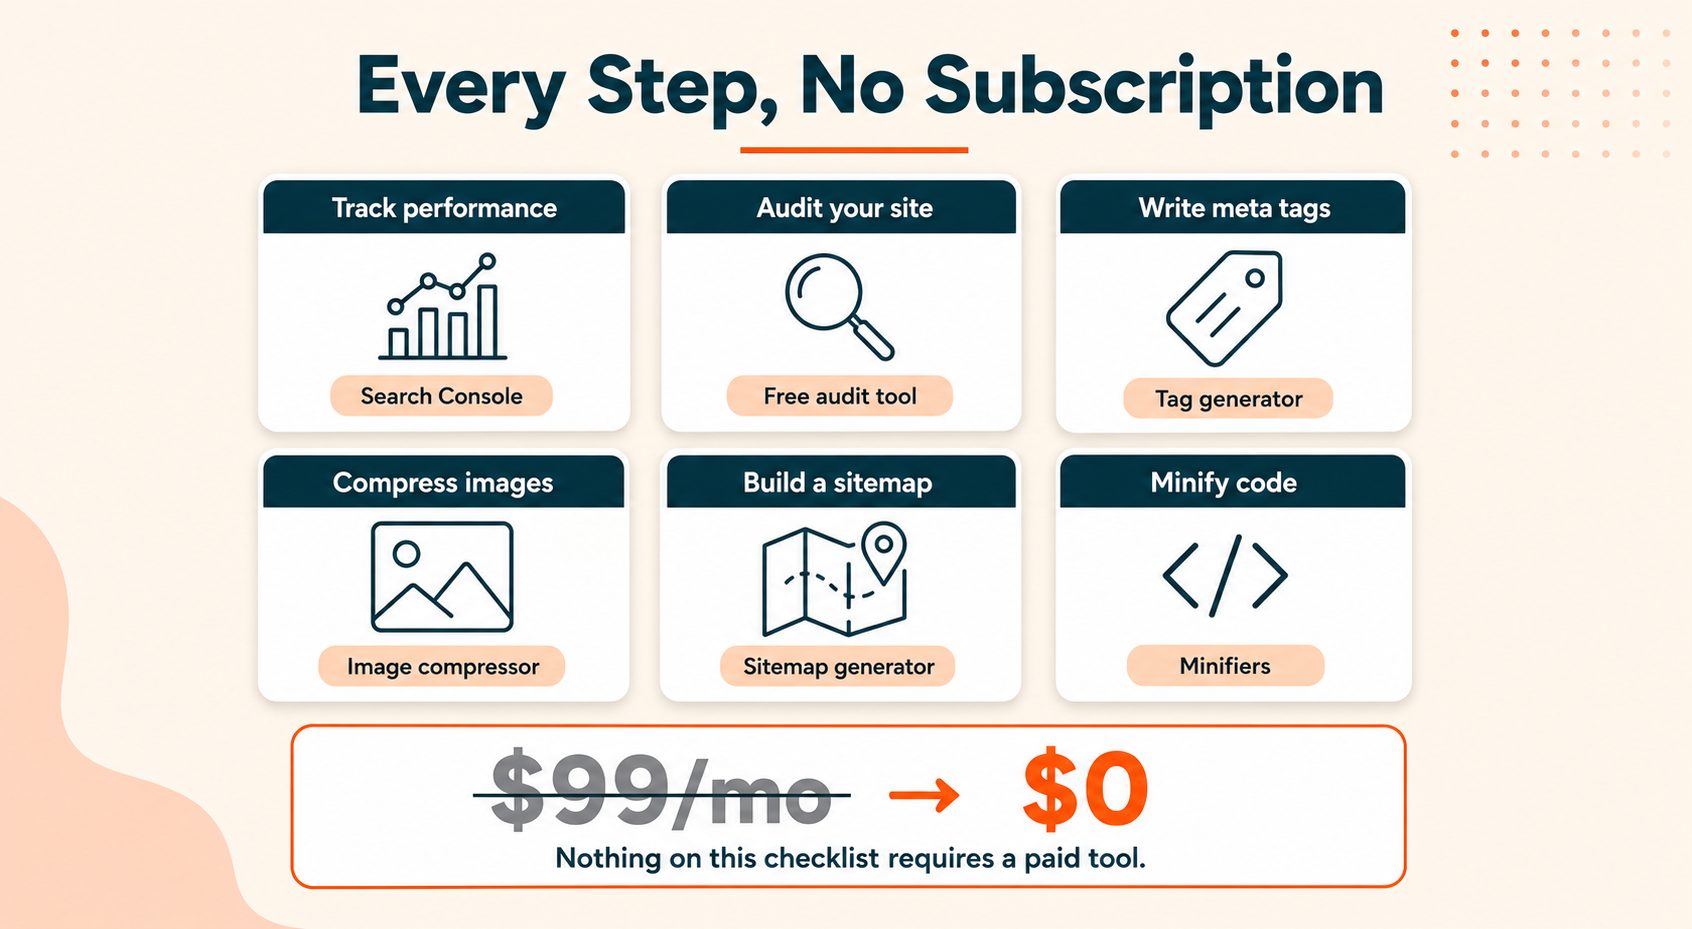
Everything here is free. No paid tools required for any of the thirty steps.
How to Use This Checklist
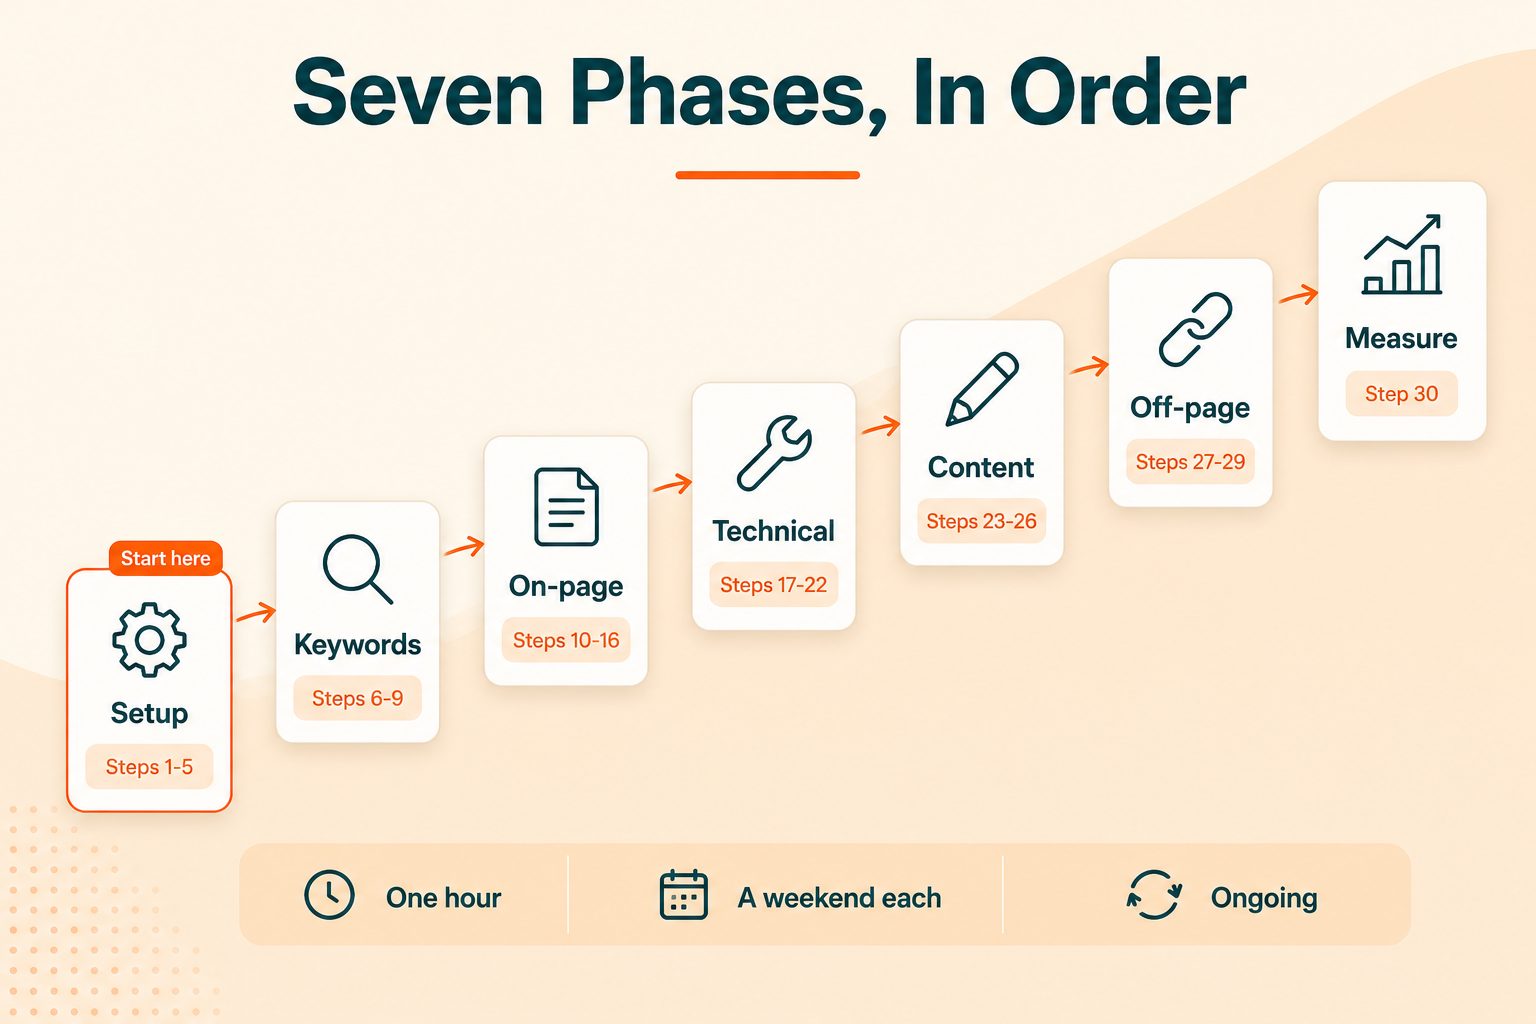
Work through the phases in order. Setup, keywords, on-page, technical, content, off-page, then measurement. They build on each other, so jumping to phase five before you have done phase one means optimising pages for keywords you have not chosen yet.
Pace it realistically. Phase one takes about an hour. Phases two and three are a weekend each. Phase four depends on how your site is built. Phases five through seven are ongoing rather than one-time tasks.
You do not need to finish everything. A site that does twenty of these well beats a site that does none of them, which is most sites.
Bookmark this and come back to it across several sessions. Trying to do all thirty in one sitting is how people burn out on SEO in week one.
If you want the search engine's own version of the fundamentals alongside this, Google's own SEO Starter Guide is short and worth reading once.
Phase 1: Set Up Your Foundations
Five steps, about an hour total. Do not skip these. Everything later in the checklist depends on the data these give you.
Step 1: Set up Google Search Console
The single most valuable free tool in SEO, and it comes from the search engine itself.
Verify your site, add your domain as a property, and have a look at the coverage report. You will not understand everything you see yet, and that is fine. What matters is that data starts accumulating from today, so that in two months you have something to compare against.
Search Console tells you which queries bring people to your site, which pages Google has indexed, and what is broken. Nothing else on this list gives you that.
Step 2: Set up Google Analytics
Search Console tells you what happens in search results. Analytics tells you what happens after someone arrives.
Install it, confirm it is recording, and then ignore most of it. As a beginner you only need three things: how many people visit, where they came from, and which pages they land on. The advanced reports can wait until you have enough traffic for them to mean anything.
Step 3: Confirm your site is actually indexed
Type site:yourdomain.com into Google. If your pages appear, you are indexed. If nothing appears, stop and fix that before doing anything else, because no amount of optimisation helps a site Google cannot see.
Common causes: the site is too new and simply has not been crawled yet, a noindex tag is left over from development, or robots.txt is blocking everything. If you are not sure what your server is actually sending, the Online HTML Viewer shows you the raw page source rather than what your browser renders.
Step 4: Pick one URL version and stick to it
Your site can technically be reached at four addresses: with and without www, over http and https. Pick one, redirect the other three to it, and use that version consistently everywhere.
If you skip this, your links and signals get split across variants, and you end up competing with yourself. Use the https version, with or without www depending on preference. It matters less which you choose than that you choose.
Step 5: Run a baseline audit
Before you change anything, get a snapshot of where you are. In two months you will want to know whether your work helped, and you cannot answer that without a starting point.
Run a full site audit and save the results. Do not try to fix everything it finds. Just record it. Most of the issues it flags are covered by later steps in this checklist anyway.
Phase 2: Find the Right Keywords
Four steps, about half a day. This is the phase people are most tempted to skip, and skipping it means optimising for words nobody types.
Step 6: List what your audience actually searches
Start from a blank page, not from a tool.
Write down twenty phrases in plain language that someone would type when they need what you offer. If you have customers, use the questions they actually ask you. If you run a blog, use the questions readers email you.
Tools are useful for validating this list. They are poor at generating it, because they do not know your business.
Step 7: Check volume and competition for free
You do not need a subscription for this.
Google Keyword Planner gives you volume ranges. Search Console's query report shows what you already get impressions for, which is the single most underused source of keyword ideas for anyone with an existing site. Google's own autocomplete, the People Also Ask box, and the related searches at the bottom of results pages all tell you what people search alongside your term.
The most important signal is free and takes ten seconds: search your keyword and look at what ranks. If the first page is all major brands, pick a different keyword for now.
Step 8: Target long-tail keywords first
A new site will not rank for "shoes." It might genuinely rank for "waterproof walking shoes for wide feet."
Longer, more specific phrases have less search volume and far less competition. They also convert better, because someone searching a specific phrase knows exactly what they want.
This is a beginner's main advantage. You are not competing for the big terms yet, and you do not need to. Ten long-tail pages ranking is more traffic than one head term you never reach.
Step 9: Map one keyword to one page
Build a simple spreadsheet: URL, target keyword, and what the searcher wants.
The rule that matters: one primary keyword per page, one page per keyword. Two pages targeting the same term compete with each other, and Google picks one arbitrarily. That is a self-inflicted problem and it is easy to avoid at this stage.
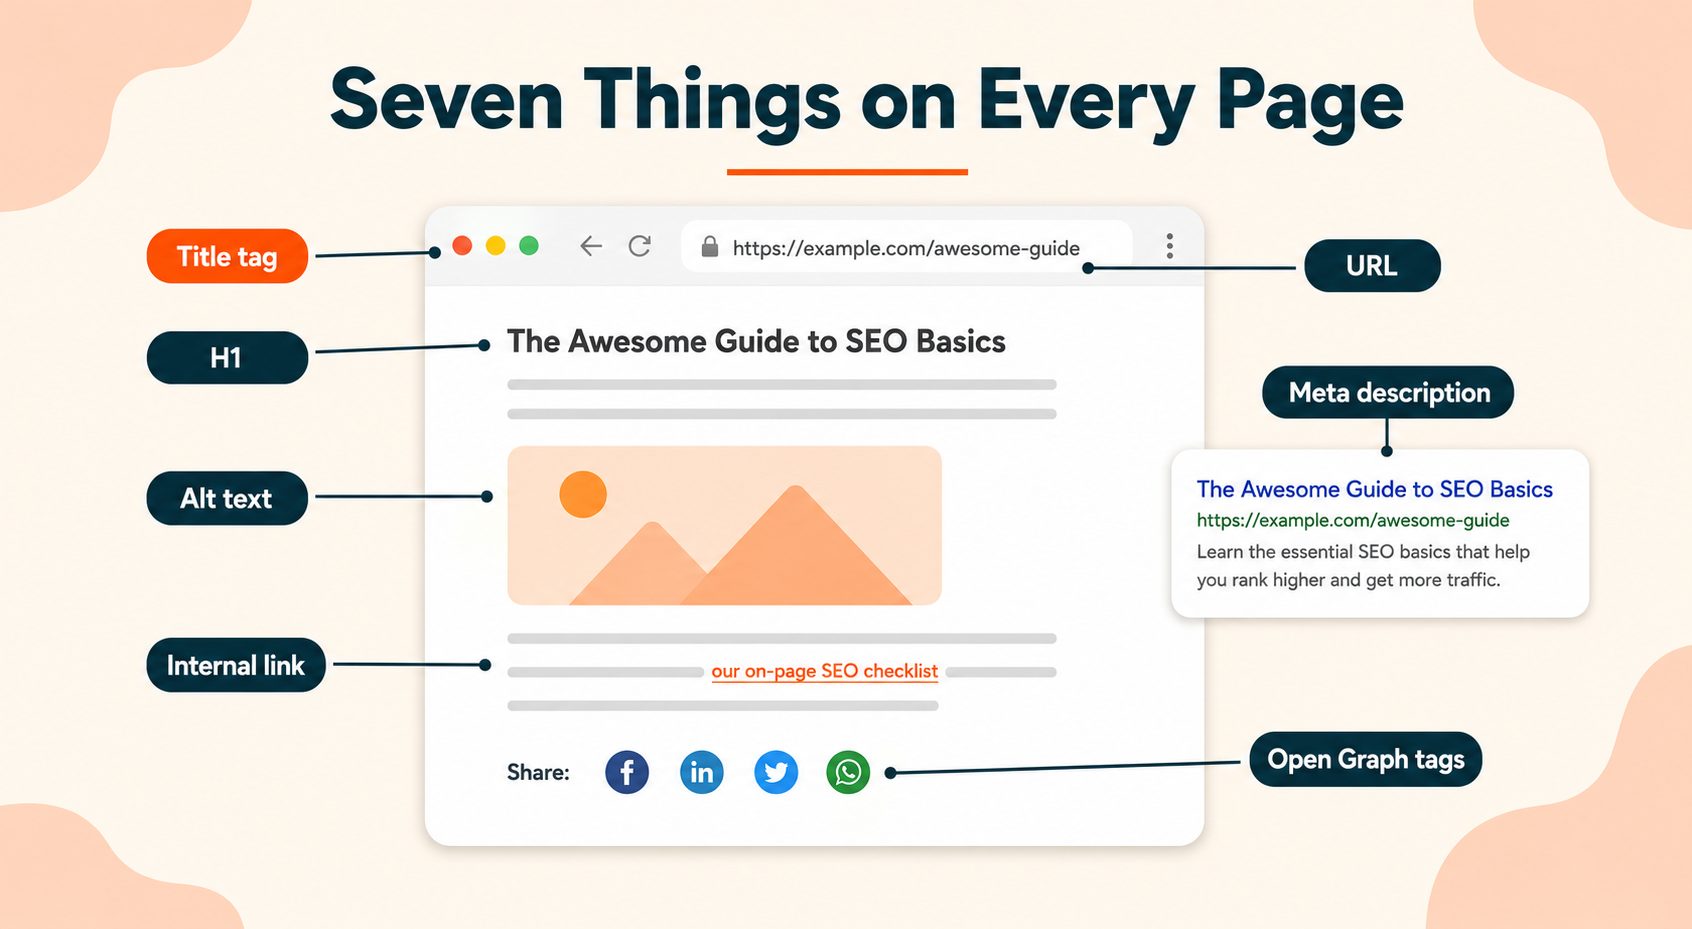
Phase 3: Optimise Your Pages
Seven steps. This is where beginners see the fastest visible results, because these changes affect how your existing pages appear in search immediately.
Step 10: Write a unique title tag for every page
Your title tag is the clickable headline in search results, and it is a confirmed ranking factor.
Keep it between 50 and 60 characters, put your keyword near the front, and write it for a person rather than a crawler. Drop the brand name suffix on deep pages, since it eats characters that could be doing work.
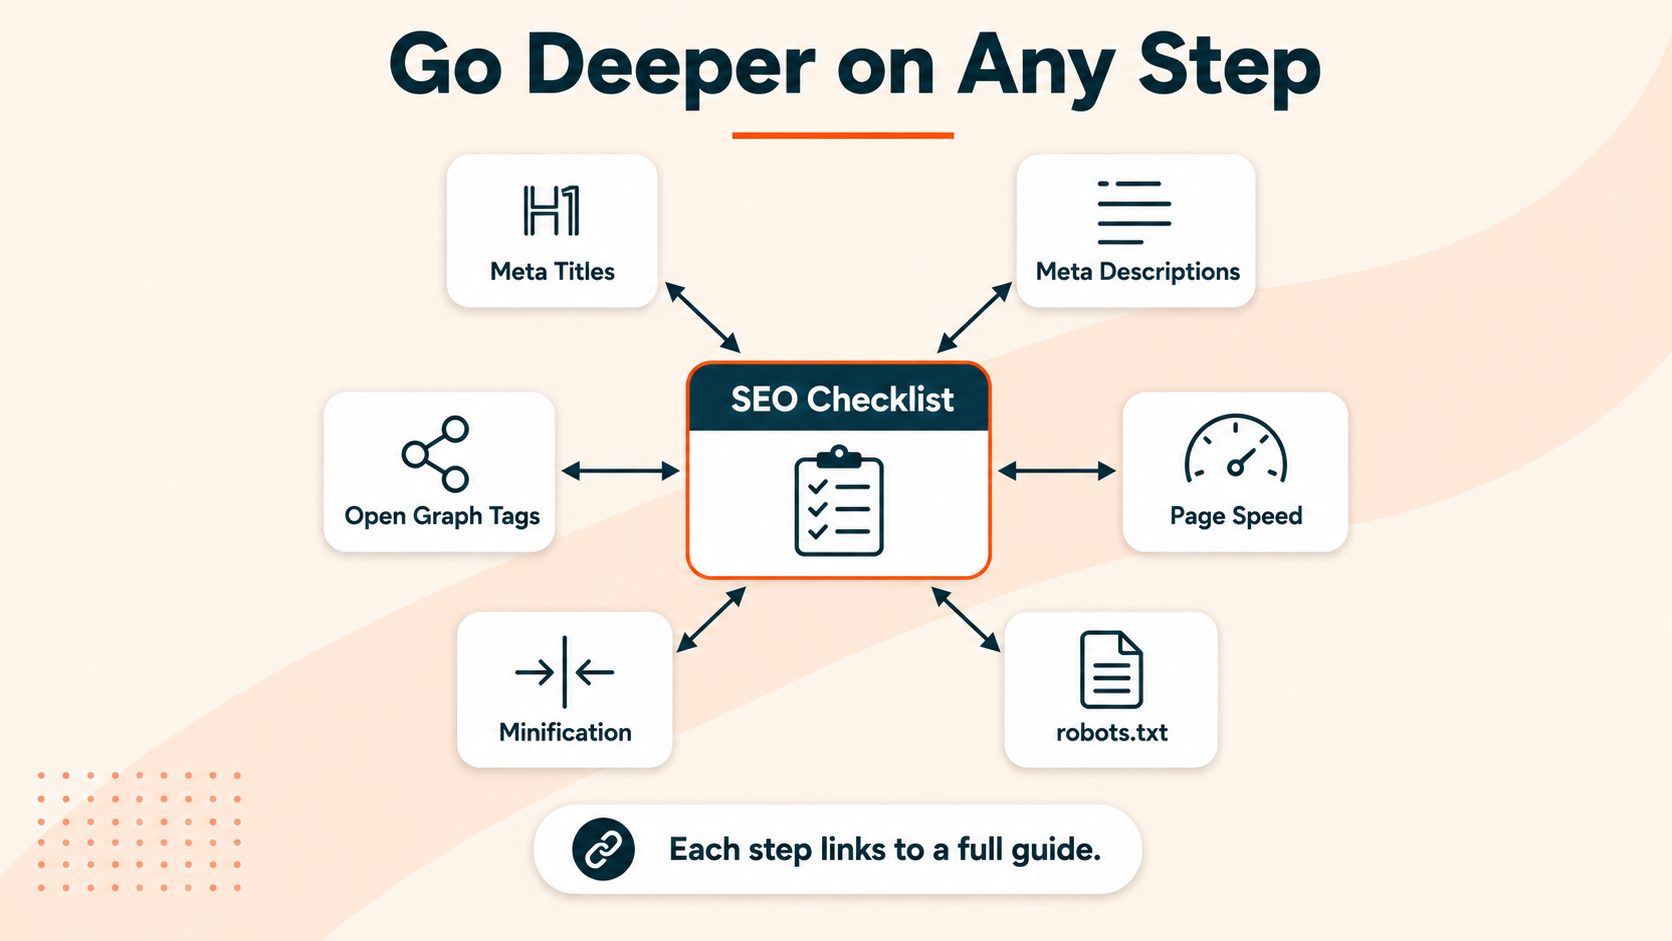
Every page needs its own. Duplicates are one of the most common reasons Google rewrites your titles into something you did not choose. There is a full guide to writing meta titles that get clicks if you want to go deeper, and the Meta Tag Analyzer will pull the current titles from any page so you can see what you have.
Step 11: Write a meta description that earns the click
The grey text under your title. Not a ranking factor, and it still matters, because it decides how many of your impressions turn into visits.
Aim for 120 to 155 characters, front-load the important part so mobile truncation does not eat it, and answer the query rather than describing the page. Accept that Google will rewrite a good share of them anyway and write well regardless, because the ones it keeps are the ones on your target queries.
The complete meta description guide covers the length rules and the rewrite problem properly. The Meta Tag Generator builds the tag block once you have the wording.
Step 12: Use one H1 and structure your headings
One H1 per page, describing what the page is about. H2s for main sections. H3s for subsections beneath those.
Do not skip levels, and do not use headings for styling. If a line looks like a heading but is not a section, style it with CSS instead. Heading structure helps readers scan and helps crawlers understand your page, and getting it right costs nothing.
Step 13: Write descriptive URLs
Short, readable, keyword included, hyphens between words, lowercase.
yoursite.com/waterproof-walking-shoes beats yoursite.com/p?id=8842.
Fix these before a page earns links. Changing a URL later means setting up redirects and losing a little of whatever the old URL accumulated, so it is much cheaper to get right the first time.
Step 14: Add alt text to every image
Describe what the image actually shows, in a sentence a person would understand.
This does two jobs at once. Screen reader users need it to know what your images contain, and search engines use it to understand and index them. Decorative images that carry no meaning can have empty alt text, which tells screen readers to skip them.
Step 15: Link between your related pages
Internal links do two things. They help readers find more of your content, and they tell Google which of your pages matter and how they relate.
Three to five per page is plenty. Use descriptive anchor text, so "our guide to compressing images" rather than "click here." Link from your newer pages to your important ones, and from your important ones to the newer ones you want discovered.
This is one of the highest-return actions on this list and it costs nothing but attention.
Step 16: Set up your social preview tags
When someone shares your link on LinkedIn, Facebook or WhatsApp, Open Graph tags decide what the preview card shows. Without them, the platform guesses, and it usually guesses badly.
You need four: title, description, image, and URL. The image should be 1200 by 630 pixels. The complete guide to Open Graph tags covers every property, and the Open Graph Generator plus the Twitter Card Generator will build the code for you.
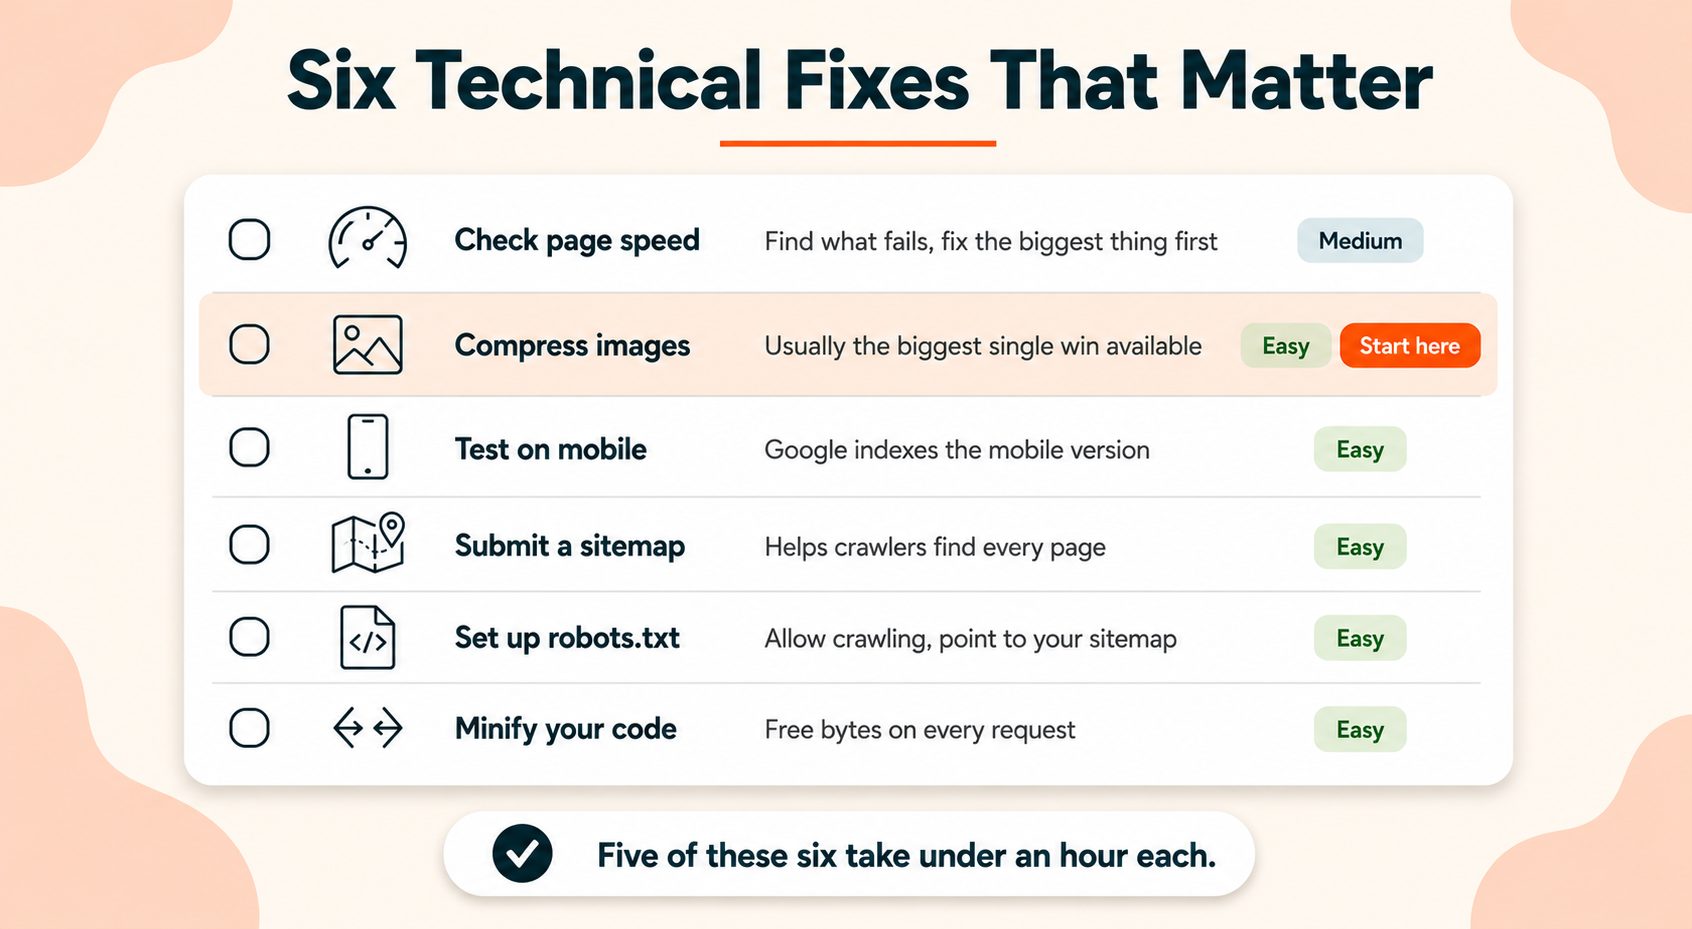
Phase 4: Fix the Technical Basics
Six steps. How long this takes depends entirely on how your site is built, but the first two are quick on any platform.
Step 17: Check your page speed
Run your homepage and two or three important pages through PageSpeed Insights. Note what fails and fix the biggest problem first rather than trying to fix everything.
One thing worth understanding before you start: the score you see is a lab test on a fast connection. Google actually ranks on field data from real visitors at the 75th percentile, which is a slower phone on a worse network. That is why a page can score 94 and still fail Core Web Vitals. The page speed and SEO guide explains the gap and gives a prioritised fix order.
Step 18: Compress and resize your images
Almost always the single biggest speed win available, and the easiest step on this entire list.
Two actions. First, resize images to the dimensions you actually display them at, because uploading a 4000 pixel photo to sit in a 800 pixel space wastes most of the file. Second, compress them to cut the file size without visible quality loss.
Do this to your ten heaviest pages and you will usually see a measurable improvement.
Step 19: Confirm your site works on mobile
Google indexes the mobile version of your site, not the desktop one. If your mobile experience is worse, that is the version being judged.
Test on an actual phone rather than a resized browser window. Check that text is readable without zooming, buttons are tappable, nothing overflows horizontally, and no popup covers the content.
Step 20: Create and submit an XML sitemap
A sitemap lists your important pages so search engines can find them all, including ones your internal linking might not reach.
Generate an XML sitemap, upload it, then submit it in Search Console. Most CMS platforms generate one automatically, so check whether you already have one at yoursite.com/sitemap.xml before creating another.
Step 21: Set up your robots.txt file
A plain text file at your domain root that tells crawlers what they may request.
For most sites the correct file is simple: allow everything, and point to your sitemap. The Robots.txt Generator builds it in a few seconds.
One warning that has cost people entire sites: Disallow: / blocks your whole website from search. Understand what you are writing before you upload it. The robots.txt guide covers the syntax, the AI crawler question, and the critical point that robots.txt controls crawling rather than indexing.
Step 22: Minify your code
Minification removes whitespace and comments from your CSS, JavaScript and HTML. Smaller files, identical behaviour, free improvement.
Run your files through the CSS Minifier, JavaScript Minifier and HTML Minifier, or better, set it up in your build process so it happens automatically. The minification guide explains the difference between minification and server compression, since you want both and they are not the same thing.
Phase 5: Create Content Worth Ranking
Four steps, and unlike the earlier phases these are ongoing rather than one-time.
Step 23: Match the search intent
Before writing anything, search your target keyword and look at what ranks.
If the top ten results are all how-to guides, Google has decided that query wants a guide. Publishing a product page will not rank no matter how well optimised it is. Intent is not something you can optimise around. You either match it or you pick a different keyword.
Step 24: Cover the topic properly
Answer the question, then answer the obvious follow-up questions someone would have after reading your answer.
This is not about word count. A 600-word page that fully answers a simple question beats a 3,000-word page that pads around it. The test is whether someone finishes reading and still needs to open another tab.
Step 25: Add real experience and evidence
Google's guidelines talk about experience, expertise, authoritativeness and trustworthiness. In practice, for a beginner, that means four concrete things.
Include specific examples rather than generalities. Show your own screenshots and numbers where you have them. Put a real author name and a short bio on your articles. Cite sources when you make a factual claim.
Anyone can write a generic overview. Content that shows someone actually did the thing is harder to replicate and it reads differently. Google Search Essentials sets out what Google expects from content, and it is worth reading once rather than relying on secondhand summaries.
Step 26: Update your older content
Refreshing a page that already ranks is usually faster and more effective than publishing a new one.
Once a quarter, look at pages losing traffic, pages with high impressions but low clicks, and anything containing dates or figures that have aged. Update the content, refresh the title if the click rate is poor, and republish.
Phase 6: Build Authority and Local Presence
Three steps. These take the longest to show results and they matter most for competitive terms.
Step 27: Claim your Google Business Profile
If you have a physical location or serve a specific area, this is the highest-return single action available to you.
Claim it, verify it, and fill in everything: hours, categories, services, photos, description. Then keep it current. A complete, active profile is how you appear in the local map results, and for many local businesses that traffic outperforms everything else on this list combined.
Step 28: Get listed in relevant directories
Industry directories, local business listings, chamber of commerce, professional associations.
The rule that matters: keep your name, address and phone number identical everywhere. Inconsistent details across listings undermine the trust signal they are meant to create. Pick one exact format and use it every time.
Quality over quantity. Ten relevant listings beat two hundred generic ones.
Step 29: Earn your first links honestly
Links from other sites are one of the strongest ranking signals, and they are also the slowest and hardest thing on this list.
What actually works for a beginner: creating something genuinely useful that people reference, getting listed on supplier and partner pages, local press coverage, industry associations, and being helpful in communities where your audience already is.
What to avoid completely: buying links, link exchange schemes, and directory packages promising hundreds of backlinks. Those carry real risk and no upside. If a service offers to sell you links, that is the signal to walk away.
Phase 7: Measure and Keep Going
Step 30: Check Search Console monthly and act on what you see
This step is what separates people who do SEO from people who did SEO once.
Once a month, look at four things:
Queries with impressions but few clicks. You are ranking but not earning the click. Rewrite the title and description.
Pages gaining position. Something is working. Do more of it.
Pages losing position. Check whether the content has aged or a competitor has published something better.
New coverage errors. Fix anything blocking pages from being indexed.
Thirty minutes a month, and it compounds. Most of what you will learn about your own site comes from this report rather than from articles about SEO.
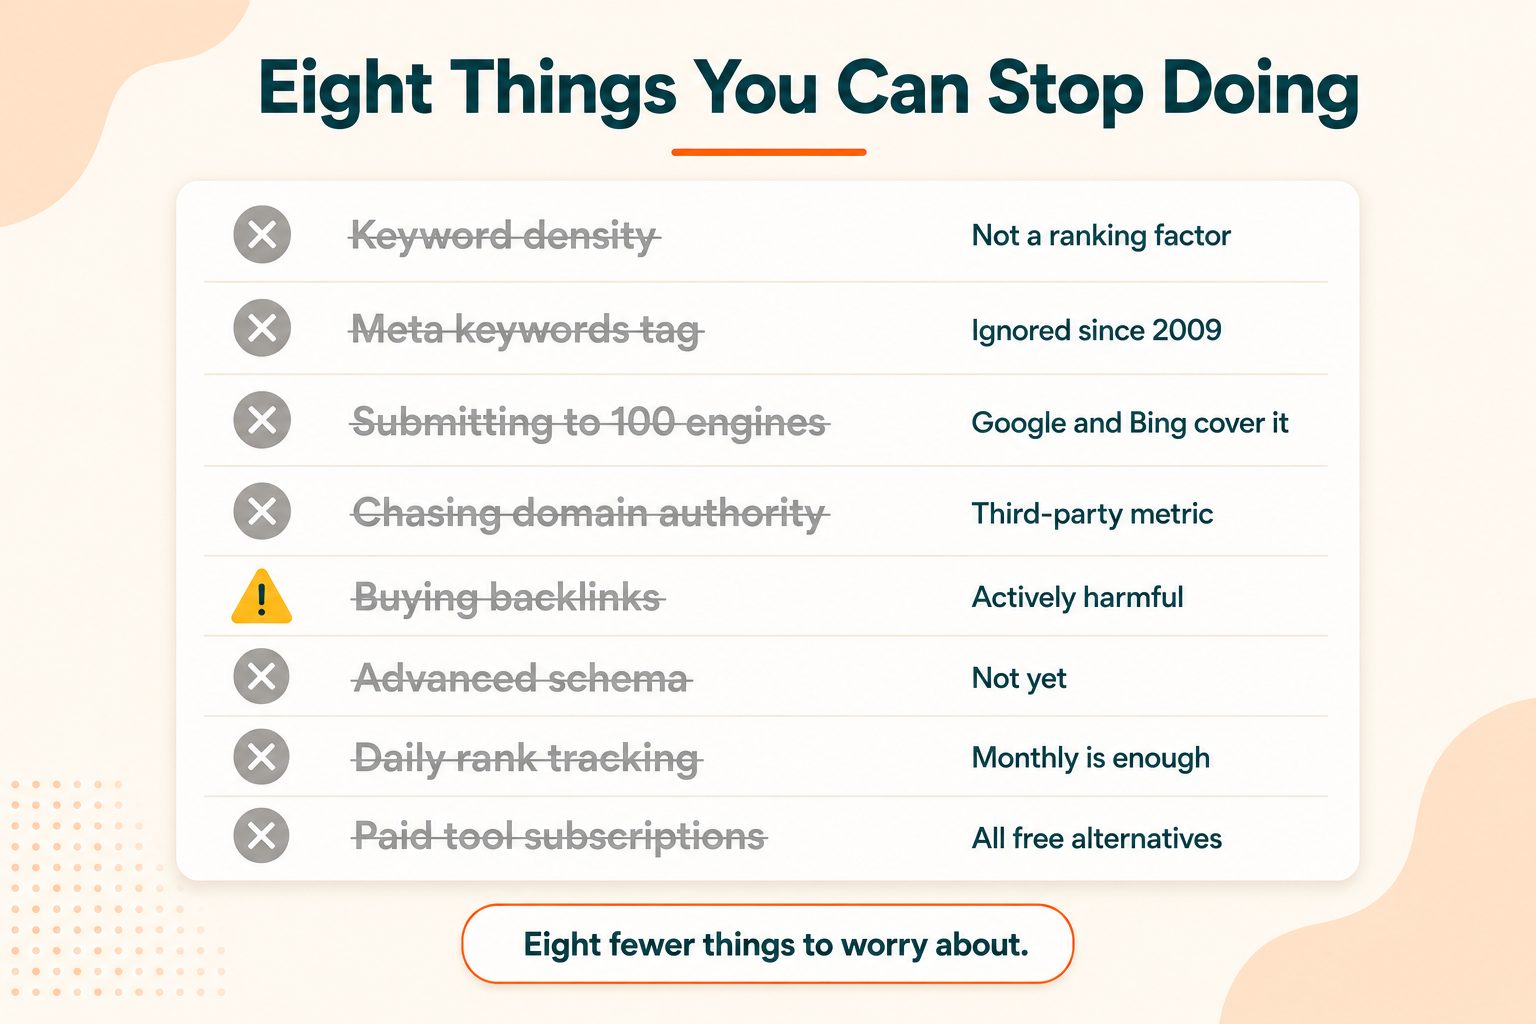
What to Skip as a Beginner
Everything above adds to your workload. This section takes some off.
Keyword density. Not a real ranking factor and has not been for many years. Write naturally and use your keyword where it belongs.
The meta keywords tag. Ignored by every major search engine since 2009. Filling it in does nothing.
Submitting to hundreds of search engines. Google and Bing between them cover almost all search traffic. Bing also feeds several other engines. Bing's webmaster guidelines are worth a read, and beyond those two you are chasing rounding errors.
Chasing domain authority scores. These are third-party metrics invented by SEO tool companies. Google does not use them. They are a rough directional signal at best.
Buying links or backlink packages. Actively harmful, not just useless.
Advanced schema markup. Useful eventually. Not in your first six months.
Daily rank tracking. Positions fluctuate constantly for reasons you cannot control. Checking daily produces anxiety and no information. Monthly is enough.
Paid tool subscriptions. Every step in this checklist can be done free. Paid tools save time once you have scale. They do not do anything you cannot do now.
That is eight things you can stop worrying about.
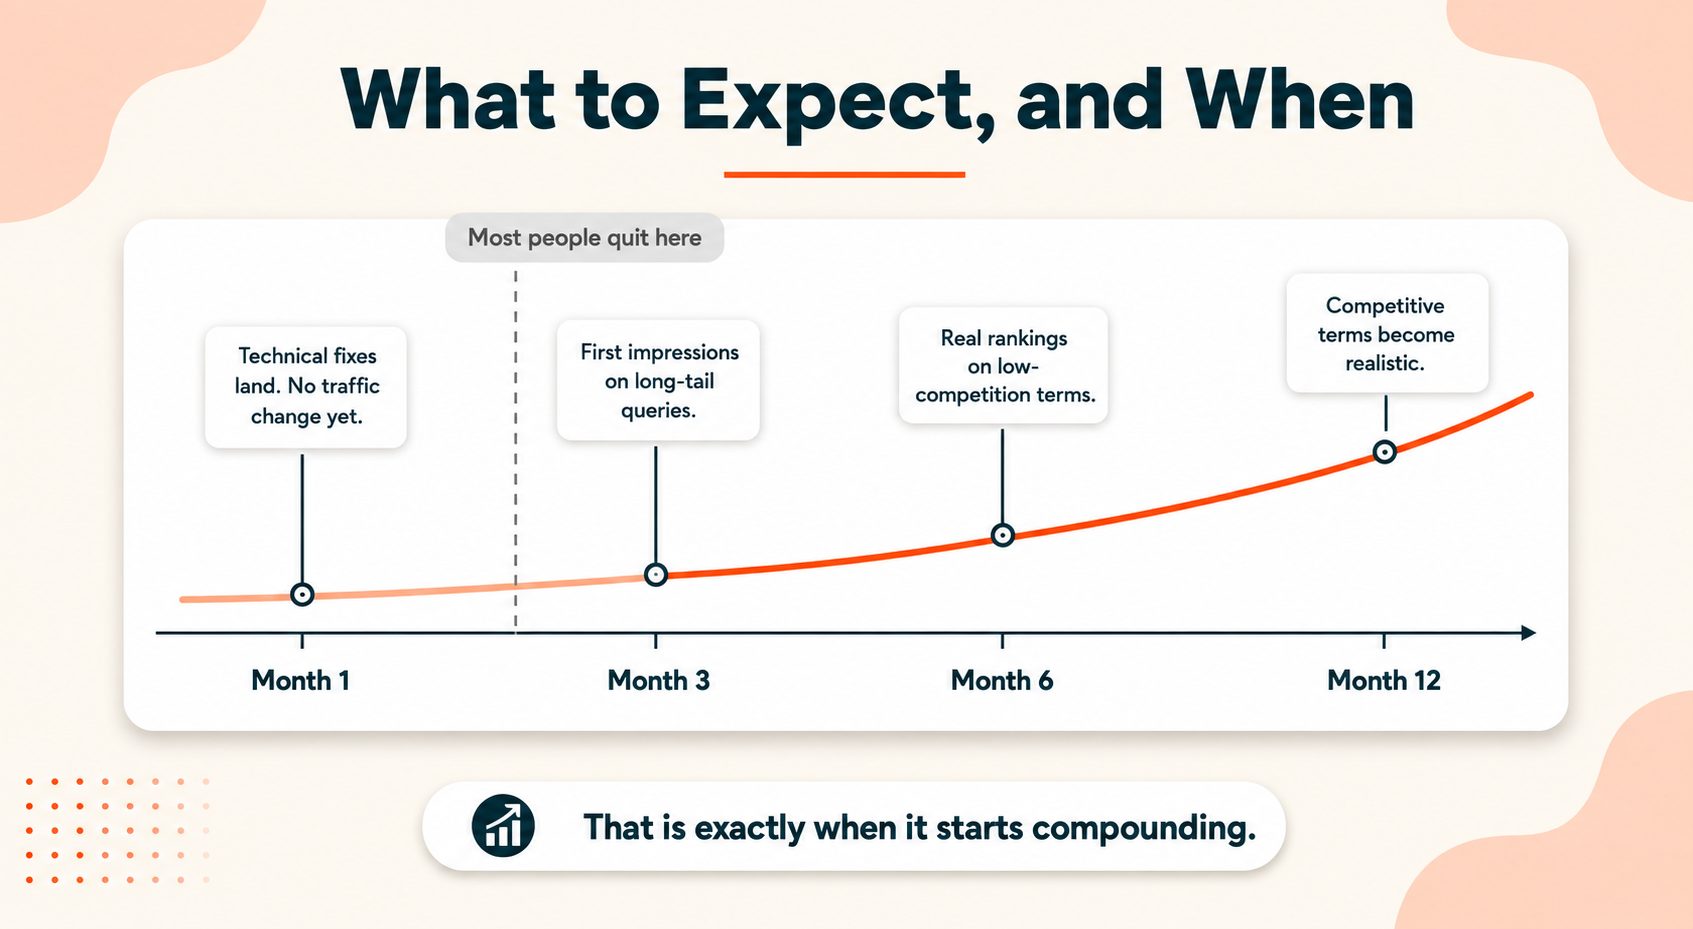
How Long Does This Take to Work?
Nobody tells beginners this clearly, so here it is.
Weeks 1 to 4. Technical fixes take effect. Indexing improves. You will not see traffic changes yet.
Months 2 to 3. First impressions appear on long-tail queries. Small numbers, but real ones. This is the first evidence anything is working.
Months 4 to 6. Meaningful rankings on low-competition terms. Traffic becomes visible in Analytics rather than just in Search Console.
Months 6 to 12. Competitive terms become realistic if you have kept publishing and earned some links.
Those ranges shift depending on your domain's age, your competition, how much content you publish, and whether anyone links to you. A brand new domain in a competitive niche sits at the slow end. An established site fixing neglected basics can move much faster.
Here is the part worth being blunt about. Most beginners quit around month two, which is exactly when the work starts compounding. Publishing consistently for six months at a mediocre standard beats optimising perfectly for six weeks and stopping. Consistency is the variable that separates sites that rank from sites that do not, and it is entirely within your control.
Wrapping Up
The first ten steps deliver most of the value. The next ten make it durable. The last ten are what you keep doing.
Nobody does all thirty perfectly, including people who do this for a living. A site doing twenty of these reasonably well is ahead of most of its competition, because most sites do almost none of them.
Start with phase one this week. It takes an hour, and everything else depends on it.
Frequently Asked Questions
Frequently Asked Questions (FAQs) is a list of common questions and answers provided to quickly address common concerns or inquiries.
How do I start SEO as a beginner?
Set up Google Search Console and Analytics first, confirm your site is indexed, then work through keyword research and on-page basics before touching anything technical or advanced
Can I do SEO myself without hiring anyone?
Yes. Everything in this checklist is free and doable without technical expertise. Agencies save you time and bring experience, but nothing here requires either.
What are the four types of SEO?
On-page, which covers content and page elements. Technical, covering how your site works. Off-page, mainly links and reputation. And local, for businesses serving a specific area.
How long does SEO take to show results?
Typically three to six months for meaningful movement on low-competition terms, and six to twelve for competitive ones. Technical fixes can show up faster.
What tools do I need for SEO as a beginner?
On-page, which covers content and page elements. Technical, covering how your site works. Off-page, mainly links and reputation. And local, for businesses serving a specific area.c
How long does SEO take to show results?
Typically three to six months for meaningful movement on low-competition terms, and six to twelve for competitive ones. Technical fixes can show up faster.
What tools do I need for SEO as a beginner?
Google Search Console and Google Analytics, both free, cover most of it. Add free tools for auditing, sitemaps, and image compression as you work through the list.
What is an SEO checklist?
An ordered list of actions that improve how search engines find, understand and rank your site. It exists so you know what to do next rather than guessing.
Do I need to pay for SEO tools?
No. Every step in this checklist can be completed with free tools. Paid subscriptions save time at scale but do nothing you cannot do without them.
What are the most important SEO basics?
Unique title tags, content matching search intent, a site that loads quickly on mobile, working internal links, and pages Google can actually crawl and index.
Is SEO still worth doing?
Yes. Search remains a primary way people find businesses and information, and organic traffic does not stop when you stop paying for it, unlike advertising.
How often should I update my SEO?
Check Search Console monthly and act on what it shows. Review and refresh older content quarterly. Full audits once or twice a year are enough.